Choosing a bike light can be a nightmare these days and sites like Amazon are full of various priced units with 5 star ratings.
One aspect that hasn’t changed is that it’s busy out on the roads and getting busier.


Bike safety is my number one priority and I’ve reviewed smart helmets, smart reflective jackets and now smart lights that not only allow you to be seen but also report road conditions so that authorities can use this information to plan better bike routes.
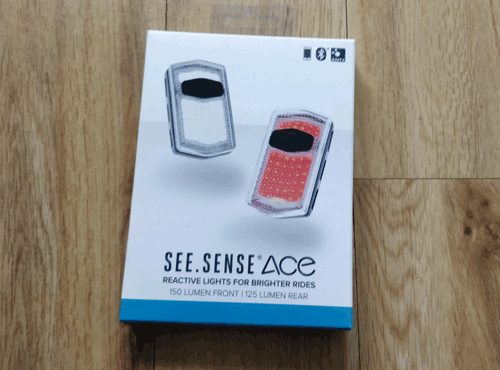
The Seesense light set (front and rear) are priced at around £79.99 and available from the Seesense website .
I have used them for around two weeks in the dark and during day conditions. This is what I discovered.
Pros :
- Excellent visibility during the day and night.
- FREE theft alert which activates on tampering with the light or if the bike goes out of range from your designated home zone.
- FREE crash alert text message to tell your next of kin that you have crashed as well as the map location to find you. Other services charge for this service.
- Increased driver awareness of you on your bike. Rear and front lights flash faster when you brake at junctions making your more visible.
- The App service records and reports the condition, route and timing of the roads you were on to a local authority (such as a town council) so they can repair/build better roads and bike routes. See my separate blog for more information.
- Standby mode to save battery charge. This can be used for the important coffee break.
- “Charge left” is displayed when you power off the light so you know if you have enough for the next ride.
Cons :
- none so far.
Apps tested
- iOS
- Android beta , currently does not have the Emergency and crash features yet, App due Q2 2019 after a chat with seesense.
Taking it out of the box

Inside the box
- Front and rear lights. The yellow background light is the front one, the white one with the red surround is the rear one.
- 2 x bike mounts.
- 1 bag clip for use on your school or business bag.
- 2 x Aero V shaped mounts for mounting on narrow bars.
- 10 x straps of different sizes
- 2 x USB cables for charging lights.
Up and running
This is me using the lights during the day.
The video on the left is the flashing rear light and the video on the right has the constant red light at the rear.
Simulating stopping at a junction
In the video below I simulate stopping at a junction and to see if the lights flashing faster.
The accelerometer in the light detects the braking movement and switches on the lights.
iOS App including the free theft and crash services
The iOS App is crisp and clean and easy to use.
It finds the front and rear light when powered on and the set-up is a breeze.
The screenshots below show you how to set up the free theft alert and the crash detection.
If the rear light is fiddled with whilst having coffee or while you are away you get a text message.
If you crash the impact sets off the phone to send a message to your designated next of kin along with the map co-ordinates.
If you want to test the crash alert set it up on the iOS App with a number to text to. Then throw the rear light at your sofa.
“Seesense’s free crash and theft alert text services are standard features”
With the theft feature you can enter your postcode to prevent you getting false alerts on theft when the bike is at home. I tested the feature and found that I needed to be about half a mile away from the house to set-off the alert so the 30m radius guide by seesense may be a little low. This may be due to the triangulation of the phone transmission units by EE around my home so it’s unfair to be critical here. In any instance my preference was to switch the Privacy zone feature off as the bike would be 1/2 a mile away before I noticed anything wrong. With the zone off if someone shakes the bike I get an alert on my phone. False positive alerts can be swiped away rather than having your bike swiped away.
I thought the lighting icon on the lights (Highlighted in red circles by me) indicating that the lights were being charged was a great idea as it tells you that they are connected to a charger and not on your bike when you are trying to find them for a ride.
Filming the lights day and night comparison.
The split screen videos show you the same cycling route and a stop with two sets of lights.
The first is a set I bought on the internet from Amazon called “Witmovings” and the second is the “seesense set”. I suspect that the Lumen value for the Witmovings is higher than the Seesense lights as it has three huge LEDs as opposed to lots of small ones. I’m still awaiting a response from the seller as the specification didn’t detail them.
Seesense is on the left below. Witmovings is on the right.
You will see the red light from Seesense is dispersed in a kind of star like fashion all around the rider whereas the Witmoving light disperse sideways and down.
In the split video below we can look at the bike from the front at night.
This time the Witmovings lights are on the left, seesense on the right.
First and second rides out
Riding on a busy B road beside my home is dangerous as many cars don’t give you much space and they all appear to be keen to get home to see Eastenders.
With the rear light on I did notice they appeared to give me more space.
On a second 50 km ride to Henley and back with about seven of us I ended up at the back after a keen start (Perhaps too keen) and the lights gave us some extra room I thought.
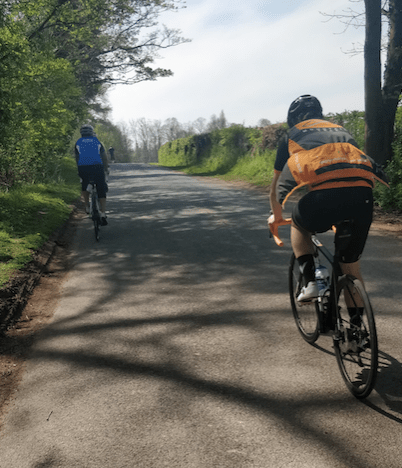
We still got two drivers who wanted to beep their horns. That’s life.
Battery life and charging
I got more than 3 1/2 hours riding battery life out of them before the rear needed charging.
The rear light drains the most as it does all the work of reporting. I had 1/6th of battery charge left after the long ride and the front still had over 50%.
The lights use USB type C connectors to charge.
PONI (Product Of Northern Ireland)
The lights are a “Product Of Northern Ireland (PONI)” and it is great to see the innovation coming from there. Three local suppliers are used to put the product together providing a lot of local employment.
Tips
- To be seen clearly during the day use the flashing modes on both front and rear lights.
- When you stop for a coffee break keep the lights on and don’t touch them. They will enter the battery saving mode. Once you jump on the bike again they will start flashing again without touching them. If you have theft mode on this will still work as they need to be on for theft mode.
- Changing modes of flashing. To change the flashing mode use a quick press, not a long press as the long press switches the unit off. The user manual just says “Press”. The buttons aren’t sticking as the unit is just waking up.
